Got an interesting invitation to a Christmas par;ty recently. It was a beautiful invitation with a difference.
The starting time was 10 am. Different than the usual 7 or 8 pm of most Christmas parties.
The invitation has a list of things to bring as well as homework assignments to complete. It also had an enclosure explaining where to find more information.
There wasn't a hint of donating to charities or buying something the host was selling.
This is a party for us. It is a party to expand one's mind. It is a party to grow one's expertise in making crafts that perhaps we have never made before.
I can hardly wait !!!
Friday, December 2, 2011
Thursday, December 1, 2011
More Bokeh (Update)
From what I have read on the Web, the canvas for bokehs is the out-of-focus areas usually behind the object in focus. Until I can solve the depth of field problem with my point and shoot (P&S), I will consider the canvas for bokehs to be any out-of-focus areas.
Lenses in P&S cameras are not designed to do good bokehs. They are designed to make all of the picture in focus.
Here are several ways to get an out-of-focus canvas:
Lenses in P&S cameras are not designed to do good bokehs. They are designed to make all of the picture in focus.
Here are several ways to get an out-of-focus canvas:
- Set the P&S camera to "aperture-priority" or AV at the biggest opening - the lowest number. If the camera doesn't have this setting, use a "macro" or "portrait" mode.
- If the camera has the ability to control the ISO or low sensor sensitivity, set it at the lowest possible setting to get as much light reflection as possible. Experiment with using a tripod.
- Pick a small object with lots of texture in the foreground to focus on. Hold the camera as close to this object as possible. Turn off the flash
- Make sure the background is far away from the object. Make sure the background has lots of reflective or light sources (Christmas lights are good).
- Press the shutter down half way to get the camera to focus on the small object. When it is in focus, snap the picture. View the picture on the LCD making sure the object is in focus and the background is out of focus.
- If the P&S has a zoom feature, zoom in all the way and take another picture. Compare the two.
Wednesday, November 30, 2011
Christmas Lights and Weird Camera Settings
On my way to do Bokeh with my point and shoot, I wanted to experiment with different settings on my camera. Here's a local barn decorated with holiday lights that I used for last night's experimentation.
 |
| normal setting |
 |
| weird setting #1 |
 |
| weird setting #2 |
 |
| weird setting #3 |
Monday, November 28, 2011
Bokehs
Surfing the web recently and came across some very colorful pictures using Bokeh effects. Many were done with very expensive cameras - yet there were a few done with a point--and-shoot like mine.
Since I like the unusual and colorful and could use my current equipment, I was intrigued.
I would love to show you some of their work, but they are protected behind fire walls. Hence, the url to find forty Bokeh photographs. Another link is Yahoo's collection of Bokeh photographs.
There seems to be some disagreement about the Bokeh effect. For my money (whatever that's worth), I see it as unfocused light sources. Some people have taken it steps further and created Bokeh paintings and Bokeh videos.
Since people are putting up their Christmas decorations, I thought would be a great time to document the Bokeh effect with my camera.
Wednesday, November 16, 2011
Cake-Decorating Week
Back in September, I signed up for a cake decorating class as I wanted to learn to decorate cookies. Last week, I happened to catch The Barefoot Contessa on the Food Network when she had a guest who specializes in decorating dog-shaped cookies. I want to do that for all-things western.
Since this class is compressed into one week, we haven't had to bake cakes and decorate them from scratch The others in the class - a grandmother, her daughter-in-law and her three teenaged grandchildren liked cookies, so it worked out well for me, too.
Because I had other commitments, I got to the store late, and they were out of sugar cookies - my first choice. So I bought some chocolate graham crackers instead. I will get to the store earlier next time, I promised myself.
At the class, I bought some of Wilton's Betty Crocker Chocolate icing. The dark brown chocolate graham crackers and the dark brown icing gave my hearts, balloons, "Happy Birthday" message, a snake, a southwestern sun, shells, stars, etc. a real western flair.
After sampling my artwork, I decided to skip the sugar cookies. Instead I ♥ chocolate graham crackers with chocolate icing.
When I am ready to make and decorate my own cookies, I will cut out boots, small railroad engines and the letters of the alphabet with my own cutters. I can't wait to see how they will ice up.
Monday, November 14, 2011
Craft Fairs
I love to go to craft fairs to talk to crafters (they are such neat people), see what they've made and how they display their products.
Here's a display in Golden recently that gave me a chuckle. I don't know if someone stole grandma's walker or whether grandma made these purses and someone kidnapped her. Either way, I let my imagination run wild.
Whatever the story, it was a very creative use of a walker. The peg board was secured to the walker with tie straps, and the red balloons drew attention to the "Pretty Purses" for sale at $45.00. There was even an extra purse behind the sign to re-stock the inventory.
You go, granny.


Friday, November 11, 2011
Basic Easy Peasy Burlap Tote
Here's the 411 on making the last posting's tote:
It takes less than a yard (mine took 26 inches) for the lining and a yard of belt backing for the strap. Beware, don't cut the burlap as it unravels big time. I pin my projects consistently (pins pointing inward from the seam) as it saves me from sticking myself and hunting for pins.
Step 1:
The tote I used is 13.5x20.5 inches. Rip or cut lining from your scraps the same size. Lining
is pretty forgiving.
Step 2:
Rip or cut pocket (same or different scrap) three or four inches less in height and width of you tote. If you don't have that big of scrap, cut two half the size and sew them together to make the correct-sized piece.
Step 3 (pocket):
Pin pocket together muted side in like picture below.
Step 4 (pocket to lining):
Pin three sides of muted pocket to muted side of lining making sure there is a good allowance at side and bottom edges. Sew pocket to lining leaving top open. Sew over easy, peasy seam at bottom.

You're ready to go anywhere, Cowgirl.
Let me know how yours turned out or where I need to make the directions clearer.
It takes less than a yard (mine took 26 inches) for the lining and a yard of belt backing for the strap. Beware, don't cut the burlap as it unravels big time. I pin my projects consistently (pins pointing inward from the seam) as it saves me from sticking myself and hunting for pins.
Step 1:
The tote I used is 13.5x20.5 inches. Rip or cut lining from your scraps the same size. Lining
is pretty forgiving.
Step 2:
Rip or cut pocket (same or different scrap) three or four inches less in height and width of you tote. If you don't have that big of scrap, cut two half the size and sew them together to make the correct-sized piece.
Step 3 (pocket):
Pin pocket together muted side in like picture below.
 |
| above is the pocket. left is a fold. pin top and right side together with muted fabric inside. leave bottom edge open |
 |
| turn pocket muted-side out and press bottom seam (from above photo) inward so you can make an easy, peasy seam here |
Pin three sides of muted pocket to muted side of lining making sure there is a good allowance at side and bottom edges. Sew pocket to lining leaving top open. Sew over easy, peasy seam at bottom.
 |
| keep pattern consistent. top of pocket at top of photo is open |
Step 5 (lining):
Pin muted sides of lining together. Sew right side seam only. Press. |
| pocket is inside |
step 6 (lining):
Pin muted side of lining to tote with tote design on outside. Sew. Ease lining or tote slightly if not a perfect fit. Press. Pin top of tote where lining meets tote. Sew. Press.
 |
| burlap is right-side out and lining is muted side in. note lining pattern is upside down here and so is the design on the tote |
 |
| pull lining up from bottom opening and push it into the tote. sew around opening of tote again to make sure it is secure |
Step 7: (lining):
Pull out lining slightly. If you pull out the lining, and it seems the bottom seam has already been sewn, you are in the pocket. Press bottom seam together for another easy, peasy seam like the pocket. Sew. Stuff lining into tote.
 |
| here is the second easy, peasy seam like pocket |
 |
| Bottom of lining sewn here. note pattern is consistent. stuff lining into tote |
Step 8: (strap):
Attach strap and sew. Careful where you put your straps so that your machine is not sewing through more thicknesses than it can handle. I'm sensitive about this because I sew on a vintage Singer Featherweight (a real workhorse but old). I used belting fabric from Hancock (on sale for $.99 a yard over the weekend - so I got two straps). Make sure to sew straps at ends so they do not unravel.
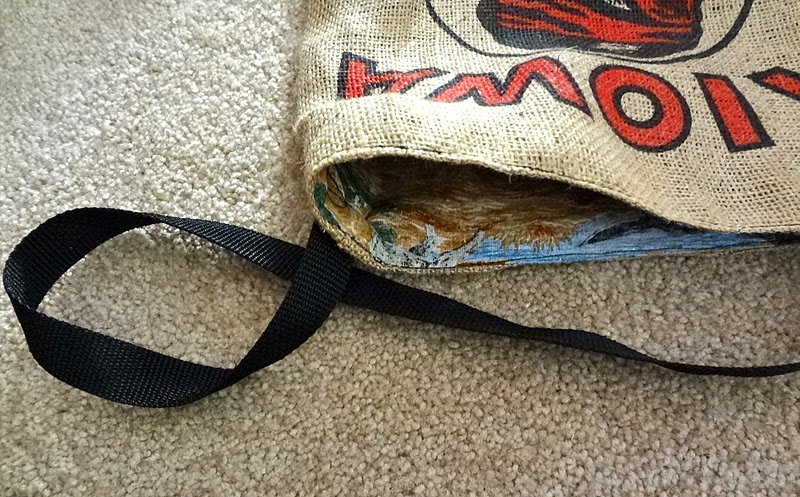
You're ready to go anywhere, Cowgirl.
Let me know how yours turned out or where I need to make the directions clearer.
Wednesday, November 9, 2011
Burlap Tote
Made this seven-step lined tote with pocket over the weekend.
I will document the process when I make another.


As you can see, I entered my tote in this contest. I'm a newbie here, so don't know if I followed the rules - but I tried. Their burlap week has turned into burlap month and the contest will go on until November 30th - The Colorado Cowgirl

I will document the process when I make another.


As you can see, I entered my tote in this contest. I'm a newbie here, so don't know if I followed the rules - but I tried. Their burlap week has turned into burlap month and the contest will go on until November 30th - The Colorado Cowgirl
Monday, November 7, 2011
These Boots Were Made for Winter Decorations
A great website to explore. Hit left arrow to return to this blog. So many super ideas, and so little time to make them ALL.
Thank you, sister, for pinning it on my Pinterest account via Carol Boyd. Thanks to you, too, Carol.
great Colorado winter decoration idea thanks to Beth Schaleben
|
Friday, November 4, 2011

Wednesday, November 2, 2011
Other Bead Material
Here are more inexpensive beading material for young crafters or bazaars - cut up straws, three sizes of letters, Cheerios that could be strung on elastic thread.


Monday, October 31, 2011


Friday, October 28, 2011
Hay-Bale Pumpkin
A rancher moved one of his hay bales to the south east corner of his horse pasture recently and added black, orange and yellow/green spray paint to create the pumpkin's face.
Last year, the horses nibbled the art work until it was gone.

Wednesday, October 26, 2011
Painting the Outside of His Travel Trailer
Recently I went to an estate sale not too far from the discount bread store on 44th. As I was parking, I noticed a small travel trailer that was being rehabbed. I knew I had to take a picture of it and talk to the owner, so I rang the doorbell.
The guy rehabilitating the trailer was eager to tell me what he was doing. He and his wife had bought the trailer for short trips intending to upgrade if they enjoyed it. I was surprised to learn their idea of a short trip was Yellowstone as I would have considered that a long one.
They weren't going to do anything to the inside as it was in pretty good shape. The outside needed painting, and he had perhaps half of it done.
He said that he was using enamel as it gave him the best-paint value for his money. He didn't like latex except for the inside of a house. He was using blue tape to mark off the contrasting color. He said the contrasting color required two coats.
The Rehab Guy said he was using skinny rollers perhaps six inches in length, and he was very pleased with them. He got his paint and supplies from Sherman Williams.
 |
| unpainted side |
 |
| painted front and side |
Monday, October 24, 2011
Polymer Clay Beads - Part I - One Color
The trick for one-color beads is to get them the correct size. If I must have them exactly the same size, I will limber up the clay, make a worm and measure off exact amounts.
Here is a tool I saw at clay class that helps do this, and it is called the Super Slicer. It comes with one set of handles and several blades. However, putting this tool together is DANGEROUS. One of the crafters in class cut her finger attaching the handles. My hubby put the straight slicer on the handles for me and is thinking of ways of putting handles on the other blades, so I don't have to take the handles on and off. It was $14.99 before coupon and tax.

In making beads and after slicing off same-size blobs of clay, form it into any shaped desired - square, oblong ball or round ball.
Before I saw the next tool I had been using tooth picks, bamboo skewers or coffee-swizzle sticks to make the bead holes. I saw this tool called the Etch 'N Pearl with three-sized instruments and decided to upgrade. It was $7.99 before coupon and tax.

In class I made small beads and used the small-sized hole maker. Be sure the bead holes are large enough for your wire or cord.
You may have to re-form the bead after you make the holes as the process can disfigure them.
All is left is baking.
Next multi-colored beads.
Friday, October 21, 2011
Polymer-Clay Beads Class
Back in early September, I signed up for Jo-Ann Fabric and Crafts class after seeing bargain classes offered in the media. After one class was canceled, my class was finally held earlier this week, and it was worth the wait. For $22.50, I got three hours of instructions on making polymer clay beads.
These will make a nice addition to my paper mache beads.
The medium is inexpensive when coupons are used. Many times Jo-Ann's has this clay half priced or there is a coupon in their flyers, emails or web site that gives a 50% discount. There is one 40% off coupon for any supplies for any class. Be sure to check the coupon's expiration dates. And usually the coupon is good for only one item, so I usually snag the biggest size available. Or use the coupon on the most expensive item.
This clay never dries until it is baked in a toaster oven. The teacher had some her son used several years ago (didn't bake it), and when limbered up, it was ready to be made into something new. However, once it has been baked, re-purposing the raw clay is no longer an option.
It didn't appear to shrink after baking.
A couple of years ago, I thought this would be great for the little cowgirls, but after I began collecting supplies learned that it is toxic. Therefore, equipment that the clay touches must now be dedicated to crafting - not food.
I use an oil-cloth tablecloth and flexible cutting boards to make the beads. I got these castoffs from garage sales or my own use. When I am done crafting, I take them outside to brush off the craft dust - no mess, no fuss. Then fold it up, put it in the craft cabinet, and it is ready for the next adventure.
I got a toaster oven off Craigslist under the "free" category. When I was visiting my sister in Texas last year, someone had a pasta maker that had been previously dedicated to polymer clay, and I brought it back. I wonder what the TSA thought when they scanned my luggage. Perhaps, "Who brings their pasta maker on vacation?"
Getting the clay warm is an important part of limbering it up. Then it will kneedable. I have successfully used a craft pan covered by a towel in the folds of a heating pad. I continue to use that heating pad because the clay didn't touch it.
During the class, I saw a couple of tools I could use with both paper machine and polymer, and I will check them out the next time I go to Jo-Ann's. And I will take my coupons with me.
Like paper mache, use medical gloves as there is some color transfer. Change gloves when going from dark to light as the dark coloring on the glove may stain.
Don't throw away used/old clay when finished. Randomly-colored beads are beautiful, too.
Polymer clay beads process:
One-color beads next time.
These will make a nice addition to my paper mache beads.
The medium is inexpensive when coupons are used. Many times Jo-Ann's has this clay half priced or there is a coupon in their flyers, emails or web site that gives a 50% discount. There is one 40% off coupon for any supplies for any class. Be sure to check the coupon's expiration dates. And usually the coupon is good for only one item, so I usually snag the biggest size available. Or use the coupon on the most expensive item.
This clay never dries until it is baked in a toaster oven. The teacher had some her son used several years ago (didn't bake it), and when limbered up, it was ready to be made into something new. However, once it has been baked, re-purposing the raw clay is no longer an option.
It didn't appear to shrink after baking.
A couple of years ago, I thought this would be great for the little cowgirls, but after I began collecting supplies learned that it is toxic. Therefore, equipment that the clay touches must now be dedicated to crafting - not food.
I use an oil-cloth tablecloth and flexible cutting boards to make the beads. I got these castoffs from garage sales or my own use. When I am done crafting, I take them outside to brush off the craft dust - no mess, no fuss. Then fold it up, put it in the craft cabinet, and it is ready for the next adventure.
I got a toaster oven off Craigslist under the "free" category. When I was visiting my sister in Texas last year, someone had a pasta maker that had been previously dedicated to polymer clay, and I brought it back. I wonder what the TSA thought when they scanned my luggage. Perhaps, "Who brings their pasta maker on vacation?"
Getting the clay warm is an important part of limbering it up. Then it will kneedable. I have successfully used a craft pan covered by a towel in the folds of a heating pad. I continue to use that heating pad because the clay didn't touch it.
During the class, I saw a couple of tools I could use with both paper machine and polymer, and I will check them out the next time I go to Jo-Ann's. And I will take my coupons with me.
Like paper mache, use medical gloves as there is some color transfer. Change gloves when going from dark to light as the dark coloring on the glove may stain.
Don't throw away used/old clay when finished. Randomly-colored beads are beautiful, too.
Polymer clay beads process:
- limber up the clay
- put it through the pasta machine if required
- shape it into balls or worms
- make beads
- push holes into beads if necessary
- reshape the beads
- bake
Polymer beads should be baked for 30 minutes at 275 degrees. If the beads are not firm, they can be re-baked for another 10 minutes. Baking time depends upon the thickness of the object.
Wednesday, October 19, 2011
Paper Mache Beads continued...
This medium has real promise to make necklaces and earrings for charity bazaars on the cheap.
However, here are some problems I need to solve with strictly organics before the spring competition:
However, here are some problems I need to solve with strictly organics before the spring competition:
- beads are too light weight - solved see below
- hemp cording needs a WOW factor - solution firming up
- clasp in back needs refinement - still working on this
- different paint (type, color) for variety
- beads need a protective coating
Hubby is an IT hardware kind of guy, and he has all these smallish screws and nuts that he saves for a rainy day. Well one day last week, it was misting. Does that count? I decided it did; and as an experiment, I put three screws into the bigger beads and two into the medium-size ones as I finished up the last of the paper mache. He has so many he will never miss my raid.
Of course, with the screws inside I had to make the beads with holes as my Dremel tool doesn't drill through metal. When they dried, they were just heavy enough. If they weren't the right weight, I could have added or subtracted the number of screws on the next batch.
Since the screws are inside the beads, there would be no problem with the rules for jewelry made from organics this spring.
Monday, October 17, 2011
Paper Mache Beads
Here are a string of beads and earrings I made for Jan Maynard's class in Longmont recently. As everything visible had to be some type of plant material, the necklace was strung on hemp cord. The metal pierced-earring posts were hidden by the paper mache beads. On the necklace, there is a knot before and after each bead to keep it in place.
Paint is not organic, but there was no penalty for using it. I used gold paint and then covered it in spots with a chalk paint used for furniture. Because of the flash and black background, the paint doesn't show up as well as it does with the human eye.
The beads and hole will shrink as they dry.
Paper Mache beads process:
- make paper mache
- form the balls with big-enough holes
- a couple a day until firm, reform beads and holes
- sand if necessary
- paint
- seal
To make paper mache, use any kid's recipe - torn up newspaper and water. Us a large pot and spoons no longer needed for cooking as the printer's ink stains. Bring the mixture to a boil with the lid on, and let it cool naturally. Stir occasionally.
I tried several ways of getting it pulpier - small pieces of newspaper before cooking as well as blending, mixing with hand mixer and letting it sit overnight after cooking. I was happiest with small pieces and letting it sit overnight with an occasional stirring.
Before making beads, add white kid's or school glue (I used Elmers). I have used a lot and a little glue, and both worked fine. Last time I made them, I used a fourth of a cup for four or five cups of pulp.
I made the beads using medical gloves as the pulp also stains your hands and nails.
To make the beads, the mixture should be wet but not too wet. If it looks on the dry side and falls apart when making the beads, it is too dry. If it looks wet and droops immediately when you set it on wax paper or tin foil, it is too wet. To change consistency, one can add more water or squeeze the pulp.
The practically difference between just right and too wet is that if it is too wet, you will have to reshape the beads many, many times during first couple of days of drying. Otherwise, you will have to reshape them only many times.
Holes are another issue. Obviously the earring beads do not need them. They will be glued to the posts.
The beads for the necklace will need holes. I used a combination of tooth picks, coffee swizzle sticks and k'bob sticks. I found that if I made the holes when I made the beads and didn't leave the sticks in the paper mache, I had to remake the holes as the bead dried. If I did leave the sticks in, I had to move them around while the bead dried so they didn't become permanently embedded.
There will be a competition in the spring at the Home and Garden show, and if I work out my issues will probably enter.
More on the issues later...

Thursday, October 13, 2011
Why Both Internet and Public Library?
From my research on crafts I found more often than not, the internet gives me a general overview while books from the public library give more depth. Sometimes, I will bookmark those good sites. Other times, I will check out the book. Occasionally I will buy it.
Speaking of public libraries, ours in Golden is implementing an automated check-in process. When I first saw it a couple of weeks ago, several very young boys were standing at the viewing window watching books go down the conveyor belt. Soon they were asking patrons if they could check in their books.
I had a couple of car-repair books with pictures on the front, and they were delighted to do mine.
 |
| outside book return |
 |
| inside book return |
 |
| very fast |
Tuesday, October 11, 2011
Crafts from the TRASHion Exhibit
Some of these crafts were inside the exhibit (made with trash), while others were in the lobby, hallway and stairway.
Paper mache interests me because it is shredded newspaper, water and a little glue.
For the fashion-made-of-trash portion of the exhibit, click here.


Paper mache interests me because it is shredded newspaper, water and a little glue.
For the fashion-made-of-trash portion of the exhibit, click here.


 |
| boxes with black & white photos? |
 |
| paper mache bowl with sticks for feet |
 |
| feathers and bead bowl |
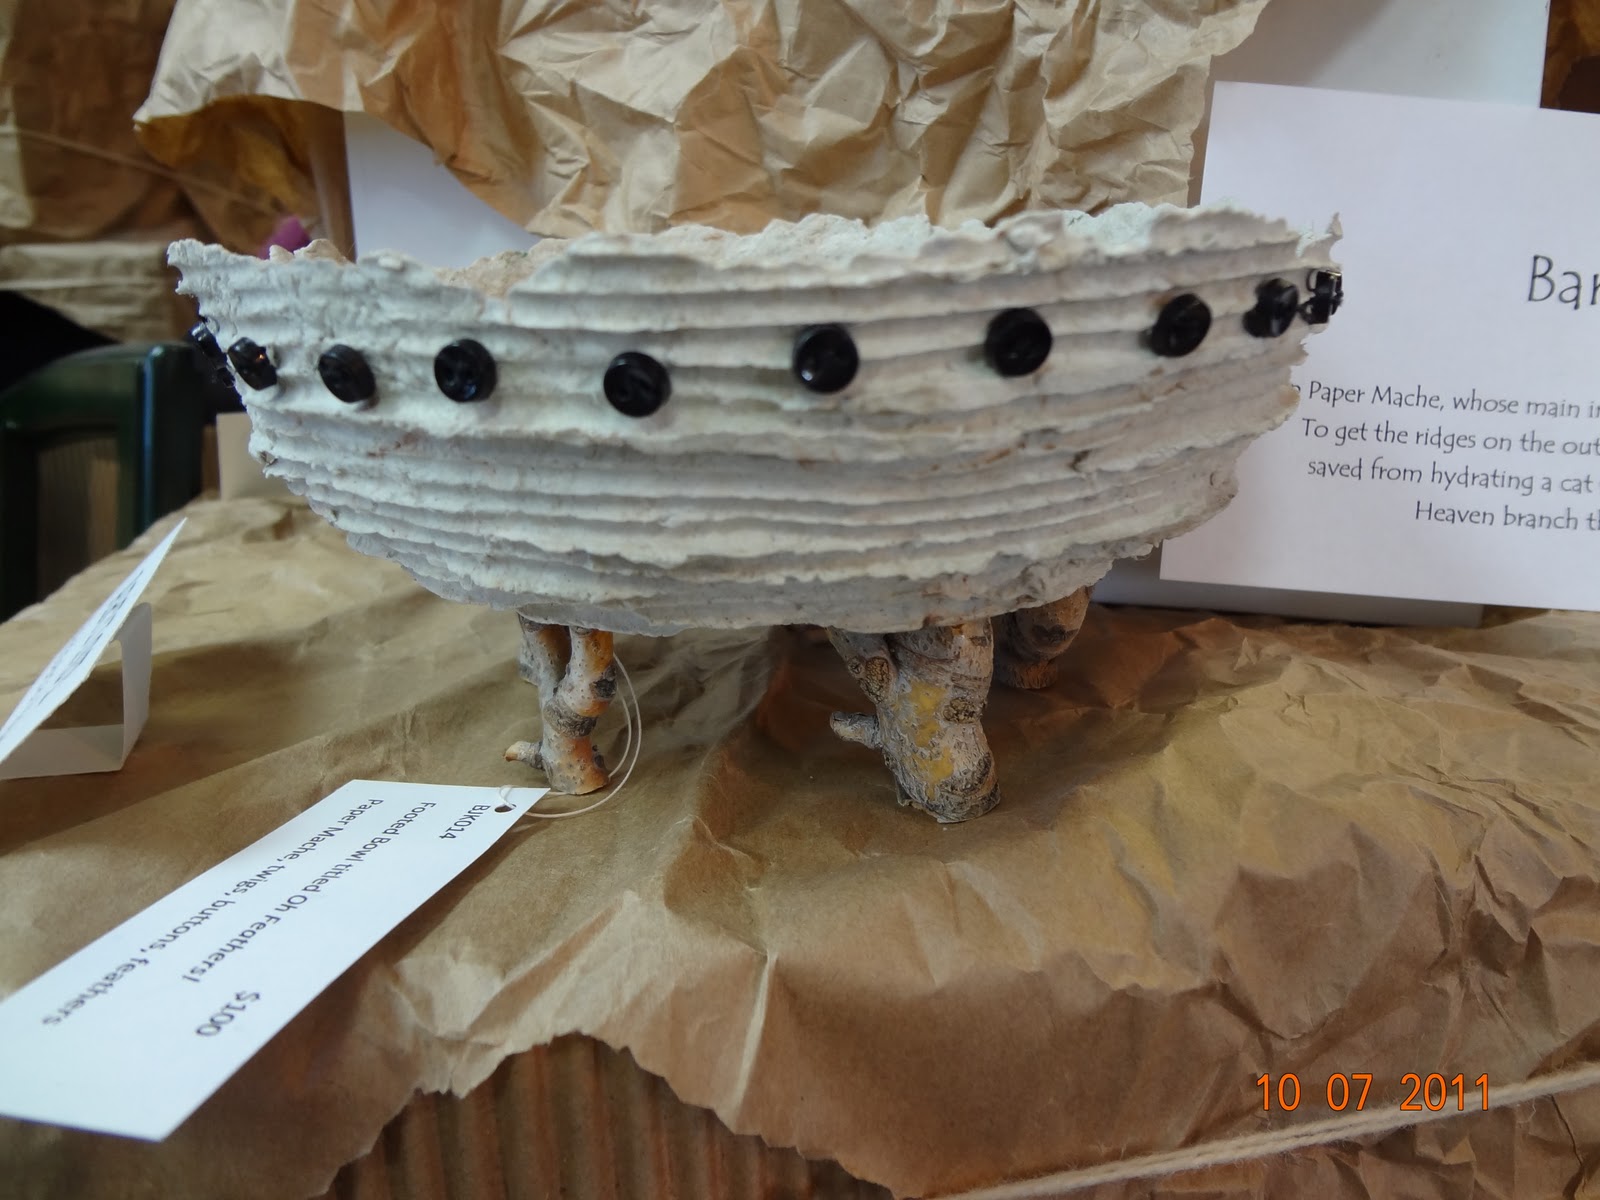 |
| more feather and bead blow with twigs for feet |
Thursday, October 6, 2011
Crafting Information - Internet First; then the Public Library
When ever I get an idea for a craft project, I want to find out everything I can - potential problems, using cost effective supplies, what others have done, etc.
One of my favorite places to find out more information is the internet. I will query ehow.com and ask.com as well as search google and yahoo. Sometimes, terminology is the stumbling block - I may have to learn the language of that particular craft.
And I look on the internet to see what books are available. When I find a title, author or major subject category, I search the local library system online for books I can request. Getting these book takes a few days.
If the book is check out or there is a waiting list, I will be put in the queue.
If the local library doesn't have what I want, I can expand the search to other libraries; and these books can be requested to my local library, but it may take longer.
When my books arrive at my local library, the librarian will send me an email to pick them up.
After this posting is done, I am headed to my local library to pick up a couple of books I requested earlier this week.
Monday, October 3, 2011
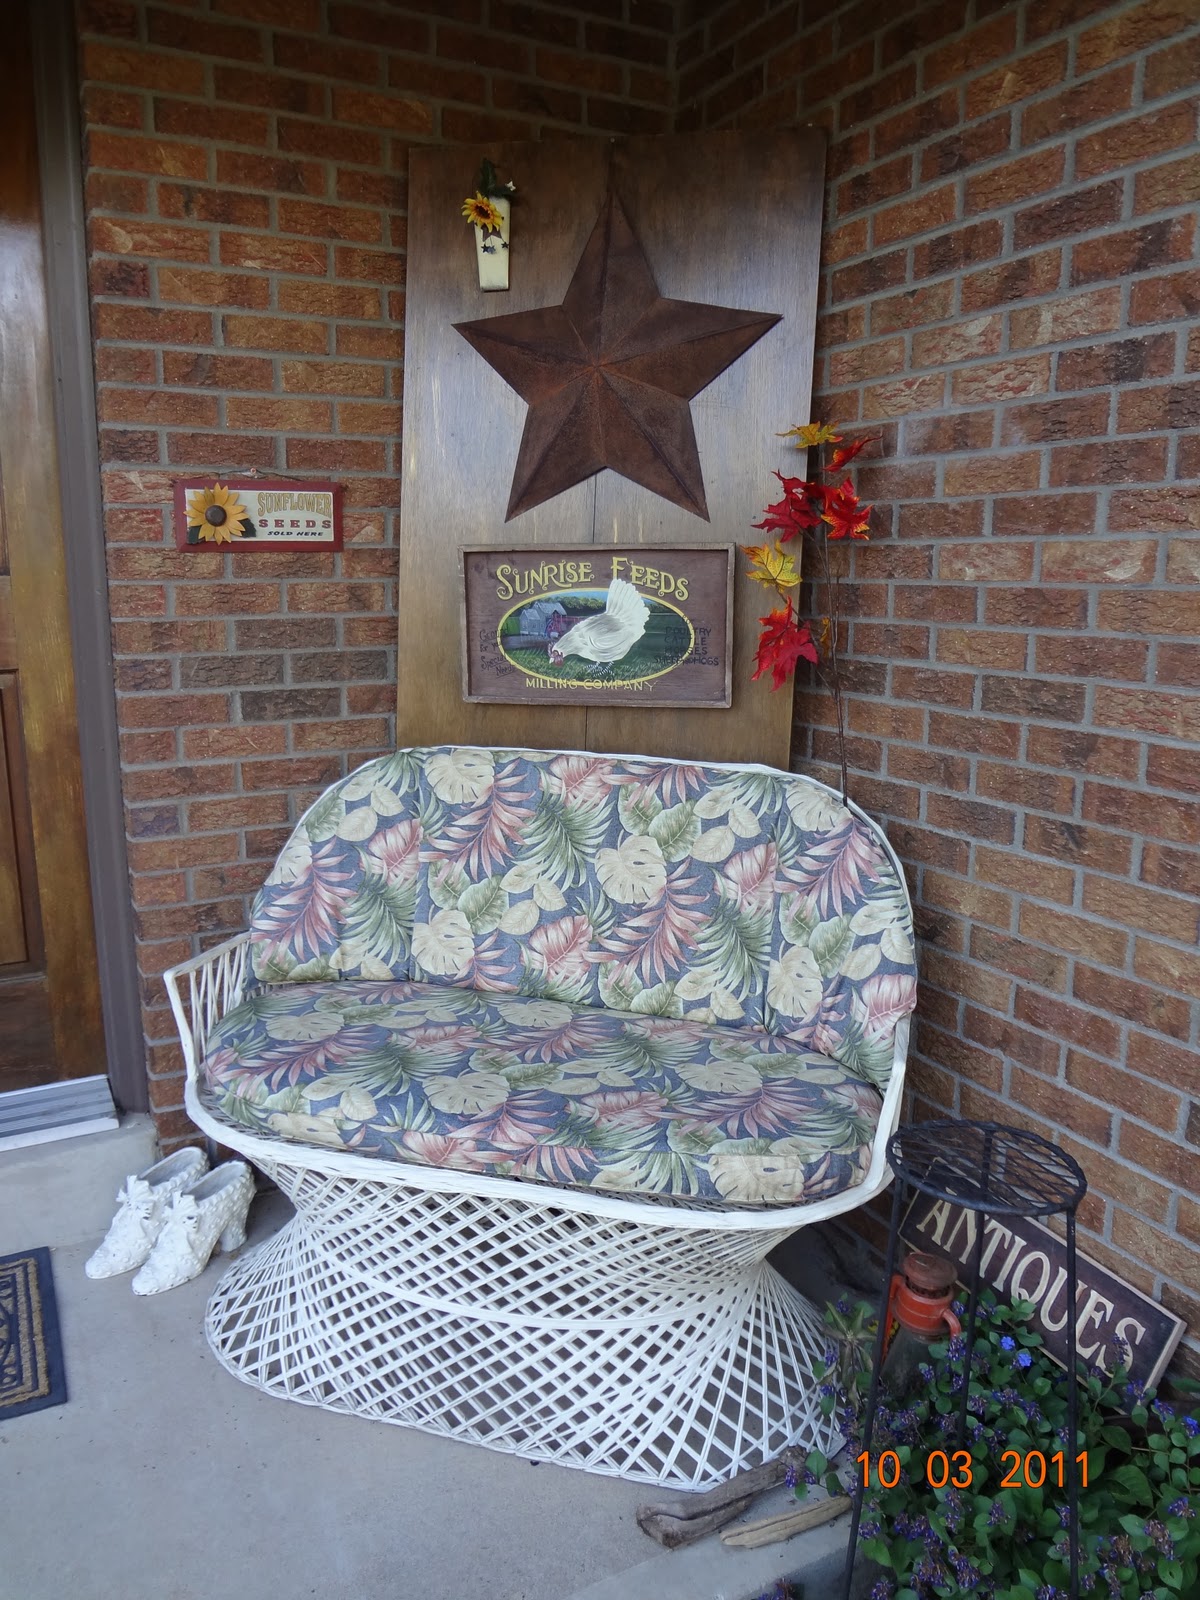
Recovered Love Seat by the Front Door
Earlier this summer, I went on a recover-the-outdoor-furniture binge.
First it was six cushions for one of the swings under the grape arbor, then it was two rectangle cushions - one for the arch chair near the "Hell Strip" (no water) the north and the other for the wicker papasan chair for the front patio. Then it was the wicker love seat's turn.
I got the fabric at a local fabric shop for $6 a yard on sale (naturally). I picked the best of the lot at the store, but when I brought it home and draped it over the lawn furniture; I wasn't happy with it. It was too bold for The Place.
So I thought about it for a couple of days. That is a lot of fabric to change my mind, I thought. But I knew I wouldn't be happy with it unless I did something different. Then I got an idea and draped it wrong-side up, and it was perfect. It gave me the muted green I wanted.
Friday, September 23, 2011
Jan Maynard's Organic Jewelry Class
The first four pictures are jewelry made by members of the Longmont flower design club and Jan Maynard, the teacher. Members made many more beautiful things. The rest of the pictures are items passed around for inspiration.
With these projects, only organic medium could be used (excluding paint and structure findings like earring backings). The Home Show in February will have a class (competition), so guild members are contemplating what they may enter.
With these projects, only organic medium could be used (excluding paint and structure findings like earring backings). The Home Show in February will have a class (competition), so guild members are contemplating what they may enter.
 |
| Club member's jewelry |
 |
| Jan's jewelry |
 |
| Jan's pins |
 |
| Jan's necklace |
 |
| Inspiration |
 |
| Inspiration |
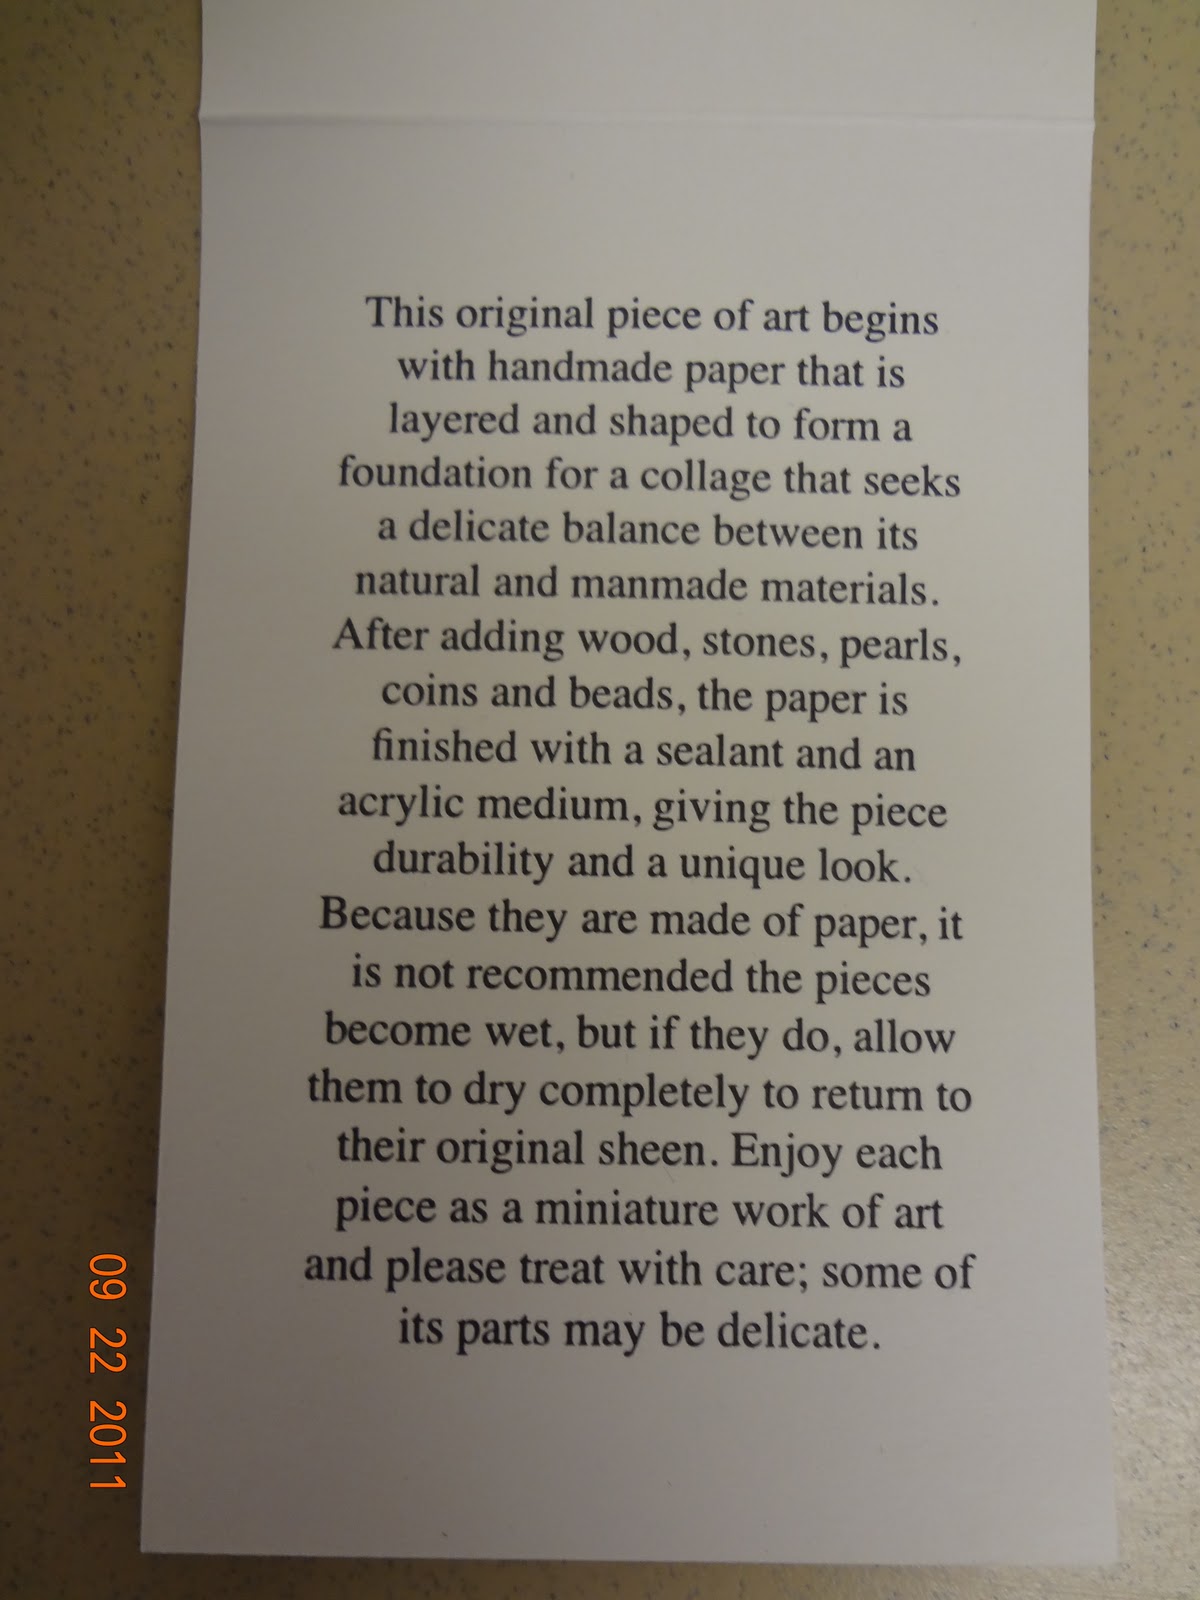 |
| Write up for fragile jewelry |
 |
| Inspiration |
Subscribe to:
Posts (Atom)